


Oasis Farm Report 12-2022

Happy Holidays,
The official first day of winter is the 21st of December but as I write this (much before this date) it feels like winter. Wind, rain, and very cold temperatures lead me to say it’s WINTER. At our elevation it is a rarity to have snow. Snowpocalips a few years back was something I had never seen in my 50+ years of living in the area so we count that as a fluke.
With the rains though, we are seeing snow on our surrounding mountain ranges and it is a beautiful sight. Mt. Shasta is covered and with her soft white blanket; her beauty is truly incredible. If you haven’t noticed before, take a moment to gaze at the Lady in the Mountain, she is gorgeous. Mt. Lassen, was almost unrecognizable as it’s been so long since it’s been covered. Even the Shasta Bally’s have a white blanket. Any amount of snow and rain does not mean we’re no longer in drought conditions but it is sure good to see water on the mountains.
On the farm the rain means muddy prints everywhere, finding and fixing holes in roofs and shelters, and green on the ground in the pastures. Isn’t Mother Nature incredible. With just a few rain showers those brown pastures are green again in no time. This makes the animals very happy and gives them some different options. They know what they need and having fresh options to choose from means healthier happier animals.

We use “winter” as the time when we will catch up on all those things that get put off. When the sun is out and the weather is nice there are just too many things to be done outside so those tasks that keep you in the house get relegated to “winter projects”.
Thus far our “winter projects” list is honestly as long as it was to begin with, which I am learning to be at peace with. Things happen, plans change, and the weather changes her mind (back to sunny days and no rain) so, learning to be fluid and flexible makes for a better environment for everyone. I had a friend ask me how fluid I was with all this stuff and my answer…I’m not cold honey and I’m not water but somewhere in between. It’s a balancing act, and I need to remember that I don’t have great balance and I never took an acting class.
This time of year is filled with holidays, celebrations, and traditions each special to the individual, and what a beautiful thing it is. Some are very traditional while others tend to fling tradition out the door and bravely try something new. Whether you are all about traditions or are looking for what fits for you, it matters not. What matters are the memories, the smiles, and the full bellies. Speaking of full bellies, the “What’s on the Menu” will be a couple of recipes that bring me back to my younger years. I hope you enjoy them and can make some yumminess and happy memories.
December Fun 411:
Flower: Narcissus, Holly
Birthstone: Turquoise, Zircon
12-2 National Fritters Day
12-6 Put on Your Own Shoes Day
12-14 National Bouillabaisse Day (a Family favorite on Christmas Eve)
12-18 Chanukah Begins
12-21 Winter Solstice - Yule
12-24 Christmas Eve
12-25 Christmas Day
12-30 Bacon Day
12-31 Hogmanay - New Year’s Eve
For the Month: Bingo, Write a Friend
Happy Holidays from The Oasis Farm
La Vita e’ Bella, M.o.M. (Mistress of the Manor)

The Oasis Farm Population +/- 92
Caretakers: 5
Cats: 6
Chickens: +/- 33
Cows Beef: 1
Cows Dairy: 1
Dogs: 3
Goats: 2
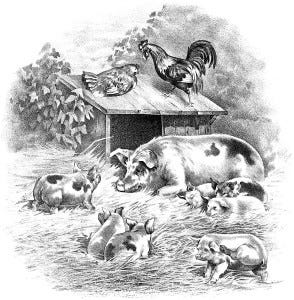
Pigs: 2
Rabbits +/- 30
Sheep: 7
Turkeys: 2


-Airline points: we have a necessary trip coming up in April and WOW are plane tickets off the charts. If you have airline travel points you would like to donate to a worthy cause we would be eternally grateful.
-Fencing
-Working Garden Hoses
-Hay &/or Grain Feeders
-Painted Desert Ewe/Ewe Lamb (looking to diversify genetics)


-Cured rampicante squash and cooking pumpkins
-Wormwood for the animals
-Seeds - check out the Farm Store for full lists
-Currently NO deliveries
-Pick-Up days by pre-arrangement


Yarn Ball Ornaments
How about another way to make fun and yes a bit messy (but it all washes up) ornaments for the holidays?
Supplies Needed:
Small water balloons (the number of balloons = the number of ornaments if you made them all)
4 Tablespoons white glue
4 Tablespoons cornstarch or arrowroot powder.
2 Tablespoons warm water
Yarn of choice but thinner is better
Glitter (optional but supper pretty with the lights)
Newspaper
Wax Paper (optional)
Scissors
Metal Spoon
Medium mixing bowl
Instructions:
1. Cover the work area with newspaper
2. Blow up your balloons. If you want a dozen ornaments you will need to blow up a dozen balloons
3. In a mixing bowl mix together glue, water, and cornstarch or arrowroot powder
4. Cut long sections of yarn (several feet) and place them in the bowl, pressing into the glue mixture.
5. After the yarn has absorbed the glue, lift it out of the liquid and give it a little squeeze over the bowl. You want it to be soaked but not drippy.
6. Take one end and tie it around the nipple (tie) of the balloon. Continue to wind the yarn around the balloon in a crisscross pattern until you have reached the level of coverage you want.
7. Tie another piece of yarn around the nipple and use it to hang the balloon to dry. Depending on your area you may want to string a simple “clothesline” to hang several from or maybe from a door. Wherever you choose to hang them be sure to cover the floor underneath because it will drip till dried.
8. Once completely dry, pop the balloon with a pin.
9. If desired, apply a thin layer of glue on the outside of the yarn ball and sprinkle with glitter. Allow to dry on a flat surface covered with wax paper.
10. Use a regular ornament hook to attach to the tree.
Note: We made these when I was a kid and would cut small circles out of one side of the dried yarn. Inside the ball, we would place cotton balls and then cut out scenes from old Christmas cards and place them inside the ball. Let the creativity roll and enjoy your holidays together.


Wine Cake
This recipe was one from my mom’s best friend Kathy whom we lost this past year. Making this reminds me of her and that brings a warm smile to my heart.
1 package yellow cake mix
1 1 package vanilla instant pudding
3/4 cup oil
3/4 cup cooking sherry
4 eggs
1 teaspoon nutmeg
Mix all the ingredients for about 5 minutes.
Pour into a prepared angel food cake pan
Bake at 350 degrees for 40-45 minutes until a tooth pick comes out clean
Cool 5 minutes
Invert onto serving plate.
Sprinkle with powdered sugar
Note: many of you know I no longer use packaged/premixed items such as in this recipe but if you don’t have the ingredients or knowledge to make those items yourself you still need to be able to make this super yummy cake. Just buy the best brands you can and bake away. One day my goal is to share with y’all recipes for do-it-yourself mixes and such.

Portage Sweet Rolls
This recipe comes from our longtime neighbor Aline (no longer with us). Every year she would make fudge and share tins with my family. I do have her fudge recipe but these rolls are still a go-to in our family.
2 cups milk
1 1/3 cup sugar
2 teaspoons salt
3 packages yeast (2 1/4 tsp each)
4 eggs
1 cup butter
1/2 cup warm water
10 - 11 cups flour
Instructions:
1. Mix yeast in water, mix in milk, sugar, salt, beaten eggs and butter
2. Add flour 1 cup at a time until dough is easy to handle. Form into a ball and turn into a greased bowl. Cover and let rise till doubled. Punch down and let rise again until doubled.
3. Punch down pull off pieces of dough and shape into rolls. Place rolls in a greased pan. Let rise again.
4. Bake at 350 degrees for 30 minutes.
Yields @ 45 rolls
Bread Machine option:
Cut the recipe down by 1/3
1 cup milk (not cold)
1/3 heaping cup of sugar
1/2 teaspoon salt
1 package yeast
1 egg
1/3 cup butter
3 cups (plus a bit) flour.
Mix on dough setting. When done form the rolls, let rise and bake as above.

Fermented Foods
How many fermented foods do you consume on a regular basis? Do you know what a fermented food is? If you do, good on you, and keep it up, and for those that don’t here is a very simplified explanation.
Fermented foods undergo an anaerobic process where microorganisms like yeast and bacteria (the good ones) break down (feed on) components in the food such as sugar (not such a good one) and turn it into organic acids, gases, or even alcohol.
There are 1000’s of types of fermented foods. Here is a simple list of some that you might easily recognize…
Apple Cider Vinegar (Think Bragg’s with the mother)
Sauerkraut (Raw)
Yogurt
Kombucha
Kefir (Milk & Water)
Kimchi
Sourdough
Pickles (Look at Bubbies Kosher Dills)
Even Beer, Cider, and Wine
So if I asked you again how many fermented foods you consume on a regular basis, what would you say? Pretty amazing how often we consume these amazing foods receiving more benefits than we realize (except for maybe the beer, cider, and wine). Our guts really do appreciate them.
With this being the appropriate time of year for harvesting cabbage and the like I wanted to offer up two sauerkraut recipes. A basic no-nonsense get-you-started type and a Christmas Kraut recipe. I found these on Donna Schwenk’s Cultured Food Life website. I will put links directly to her page in the recipes. I highly recommend if you are interested in improving your health take a look at her information. You will be amazed and read her story. It still brings tears to my eyes. Here is a link to her site CulturedFoodLife.com
Basic Kraut This is an abridged version of the original. The links will take you to the original recipe.
Ingredients:
1 package Cutting Edge Cultures or 1/2 cup Kefir whey (think curds and whey, solids vs. liquids)
Filtered Water
1 large head of cabbage
1 Tablespoon Celtic Sea Salt
Equipment:
2 half-gallon jars with Airlock lids
Instructions:
1. If using the starter culture, mix the culture with 1/2 cup water. Let this sit while you prepare the other ingredients- about 10 minutes. If using kefir whey, add when the recipe calls for culture.
2. Remove the outer leaves and core of cabbage. Shred cabbage to the desired length. Options: chopped fine, chopped chunks, hand-cut, or put through a food chopper. It’s all about how you like it.
3. Add cabbage to a large bowl. Add salt and toss to evenly combine.
4. Pack cabbage into the jars making sure to leave 1 to 2 inches of head space at the top of each jar to allow for expansion.*
5. Evenly add the culture or whey to the jars. Fill the jars with water leaving the 1 to 3 inches at the top for expansion.
6. Place secure lids or airlocks on jars**. Set in a cool dry place, out of sunlight for six to seven days. After 6 days taste them. If they are tart they are ready and you can eat them or place them in the refrigerator.
7. While on the counter, check the kraut every day to make sure the veggies are fully submerged in the water. If they have risen above the water, simply push them down so they are fully covered again. If any white spots formed because the veggies rose above the water, do not worry. Remember this isn’t harmful, Just scoop out the veggies that have the white spots on them and push the rest back under the water.
Note: *If you don’t have half-gallon jars, use quart jars.
**If you don’t have airlock lids that’s okay just remember to burb your kraut as it’s fermenting to release the gasses that will build up. Also putting your jars on a plate can help to mitigate any possible mess.

Christmas Kraut
This has to be one of my all-time favorite krauts. It is amazing just following the simple recipe but you have the option to add a pinch of cinnamon or clove to make it even more festive.
Ingredients:
1/4 teaspoon Cutting Edge Cultures or 1/2 cup kefir whey
1 cup water if using the Cutting Edge Culture
1/2 small cabbage
1 medium apple
1/2 Tablespoon Celtic Sea Salt
1/4 cup dried cranberries
1 medium orange juiced, you can include some of the pulp
Water to cover veggies
Instructions:
1. If using the Cutting Edge Culture, stir together with 1 cup water and set aside while you prepare the other ingredients. If using kefir whey add when the recipe calls for culture.
2. Shred the cabbage and apple. Put into a large bowl. Mix in the cranberries and salt.
3. Place in your jar(s) of choice.
4. Add the orange juice, Cutting Edge Culture, or kefir whey and cover with water. Leaving a couple of inches at the top for expansion.
5. Seal the container and let sit on your kitchen counter, out of direct sunlight, for 6 days. After 6 days place in refrigerator.
6. While on the counter, check the veggies every day to make sure they are fully submerged in the water. If they have risen above the water, simply push them down so they are fully covered again. If any white spots formed because the veggies rose above the water, do not worry. Remember this isn’t harmful, Just scoop out the veggies that have the white spots on them and push the rest back under the water.
Note: Kraut can be kept in a covered airtight jar in the refrigerator for up to 9 months. I just don’t see it lasting that long though.

Community Partners

A huge THANK YOU to Salina at Artistic Wonders for the wonderful Graphic Art.
If you require art of any sort give her a shout at:
artisticwonderscreates@gmail.com